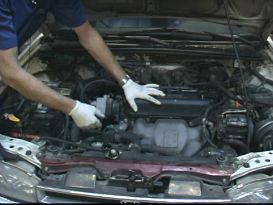
Most of the time, replacing a thermostat need not be taken to the professionals. Depending on the design of the auto units under your hood, this job should be pretty easy to accomplish. Before doing anything under your auto’s hood, it’s highly important that you first, in a way, get “acquainted” with the different auto components located there. The more familiar you are with your auto systems’ layouts, the easier it is for you to replace and repair various auto parts.
Keep in mind that your auto thermostat won’t be easy to spot the first time around. It has its own housing and is generally located near the forefront of your engine, near your top radiator hose. To replace your thermostat, you need to first remove it from the housing. Inspect it and replace it if it is no longer in great working order if there is a gasket.
Some tools you may need for this job includes antifreeze or coolant, a rag for cleaning the thermostat housing and a screwdriver.
Follow these easy steps on replacing your thermostat.
Step #1: Make sure the engine is cool to touch. If your vehicle has just overheated, remember to wait an hour or two for the vehicle’s operating temperatures to go down.
Step #2: Work in a well-lighted area. Since you’ll be tampering with some of the most vital auto components in your vehicle, make sure you won’t accidentally sever anything that you’re not supposed to. A well-lighted area should prevent you from making any crucial errors when replacing your thermostat.
Step #3: Open your vehicle’s hood.
Step #4: Look for your vehicle’s thermostat housing. As I mentioned earlier, the thermostat housing should be near your top radiator hose, in front of your engine. It’s best to bring out your owner’s manual and look for it there if you can’t spot it. Unfortunately, there are some manuals that won’t indicate the exact location of the thermostat housing. Look between the engine block and the top radiator hose-it should be around the area if your other reference materials fail to show you where the thermostat is located.
Step #5: Now that you’ve located the housing, disconnect your top radiator hose. The radiator hose is usually connected using a clamp. Remove one end of the clamp to release the hose.
Step #6: Pull the housing and remove the thermostat housing cover gently. Don’t yank. Subtle force should be enough to pry the cover loose. Set the cover aside.
Step #7: Take the time to find out how it is installed, before hastily removing the thermostat. Since you’re going to be installing a new thermostat, it saves time to first figure out how the thermostat attaches to the housing.
Step #8: Remove the thermostat. If there are rotten gasket bits present, remove those as well. Put your thermostat aside for later disposal and wipe clean the interior of the housing. Look for any other decaying bits from the gasket and try to gauge whether or not you need to replace your gasket as well.
Step #9: Insert your new thermostat (and gasket) into place. In most cases, thermostats need to lean towards the engine block, with its top bit facing the component. If the thermostat you’re installing comes with a jiggle valve (the bell-like valve found on one side of this type of thermostat), make sure it’s on top to let bubbles pass through.
Step #10: Replace the housing cover if applicable.
Step #11: Bring the housing back into its original position and secure it. Most of the time, the thermostat housing is secured into place with clamps or bolts. Before doing anything else, make sure the housing is securely in place.
Step #12: Connect your top radiator hose again.
Step #13: Check your radiator and radiator overflow tank’s levels. If they’re running low, add some water-coolant mixture and leave the radiator cap off for a while.
Step #14: Start your engine and let it run for a bit.
Step #15: Check your radiator’s fluid levels. If you need to, but don’t fill the entire radiator with water-coolant mixture, add more coolant. There should be enough room in the neck to let air escape. The levels should drop when your engine begins to warm up. If the level goes too low, then add some more water-coolant mixture after you turn off your engine.
Step #16: Turn on your heater full-blast.
Step #17: Check your radiator’s fluid levels once more. If things are working normally, wait for the engine to reach normal operating temperatures.
Step #18: Once in the normal operating temperatures, turn off your heater and your engine.
Step #19: If needed, once again, check your radiator’s fluid levels and re-fill with water-coolant mix.
Step #20: Replace your radiator cap.
Step #21: Close your vehicle’s hood and clean the surrounding areas up.
Step #22: Note down the procedures you followed and the date you changed your thermostat for future reference. It’s always best to keep track of any auto part, modifications and repairs-replacements you make, so that in the future, if you need to replace an auto component earlier than usual, you can determine if your vehicle has bigger problems you need to worry about. Some owner’s manuals have spaces at the back for personal notes on your auto. Use a small notebook for this purpose if you’ve already used up the last few pages of your manual.
NOTE: While you may have just successfully replaced your thermostat, it’s important that you monitor your engine’s temperature gauge the next few days after the installation. If you did install your thermostat correctly, this should give you an idea. If you still experience cooling auto and troubles overheating after replacing your thermostat, then there might be something else that’s wrong with your auto.


No comments
Comments feed for this article
Trackback link: http://autocaresjucan.com/2014/06/addressing-auto-problems-what-you-have-to-do-when-your-thermostat-is-not-functioning-well/trackback/